

Drip Tape Connectors: 5 Common Installation Mistakes and How to Avoid Them
Modern agriculture relies heavily on efficient water management systems, with drip irrigation representing one of the most effective methods for delivering precise amounts of water directly to plant root zones. The success of any drip irrigation line system depends significantly on proper installation and maintenance of its components, particularly the connectors that join different sections together. Understanding common installation mistakes and learning how to avoid them can save both time and money while ensuring optimal system performance throughout the growing season.
Professional irrigation installers and experienced farmers alike recognize that even small errors during connector installation can lead to significant water loss, reduced system efficiency, and increased operational costs. The following comprehensive guide examines the most frequent mistakes encountered during drip tape connector installation and provides practical solutions to ensure reliable, long-lasting connections that maintain system integrity under various field conditions.
Understanding Drip Tape Connector Fundamentals
Essential Components and Their Functions
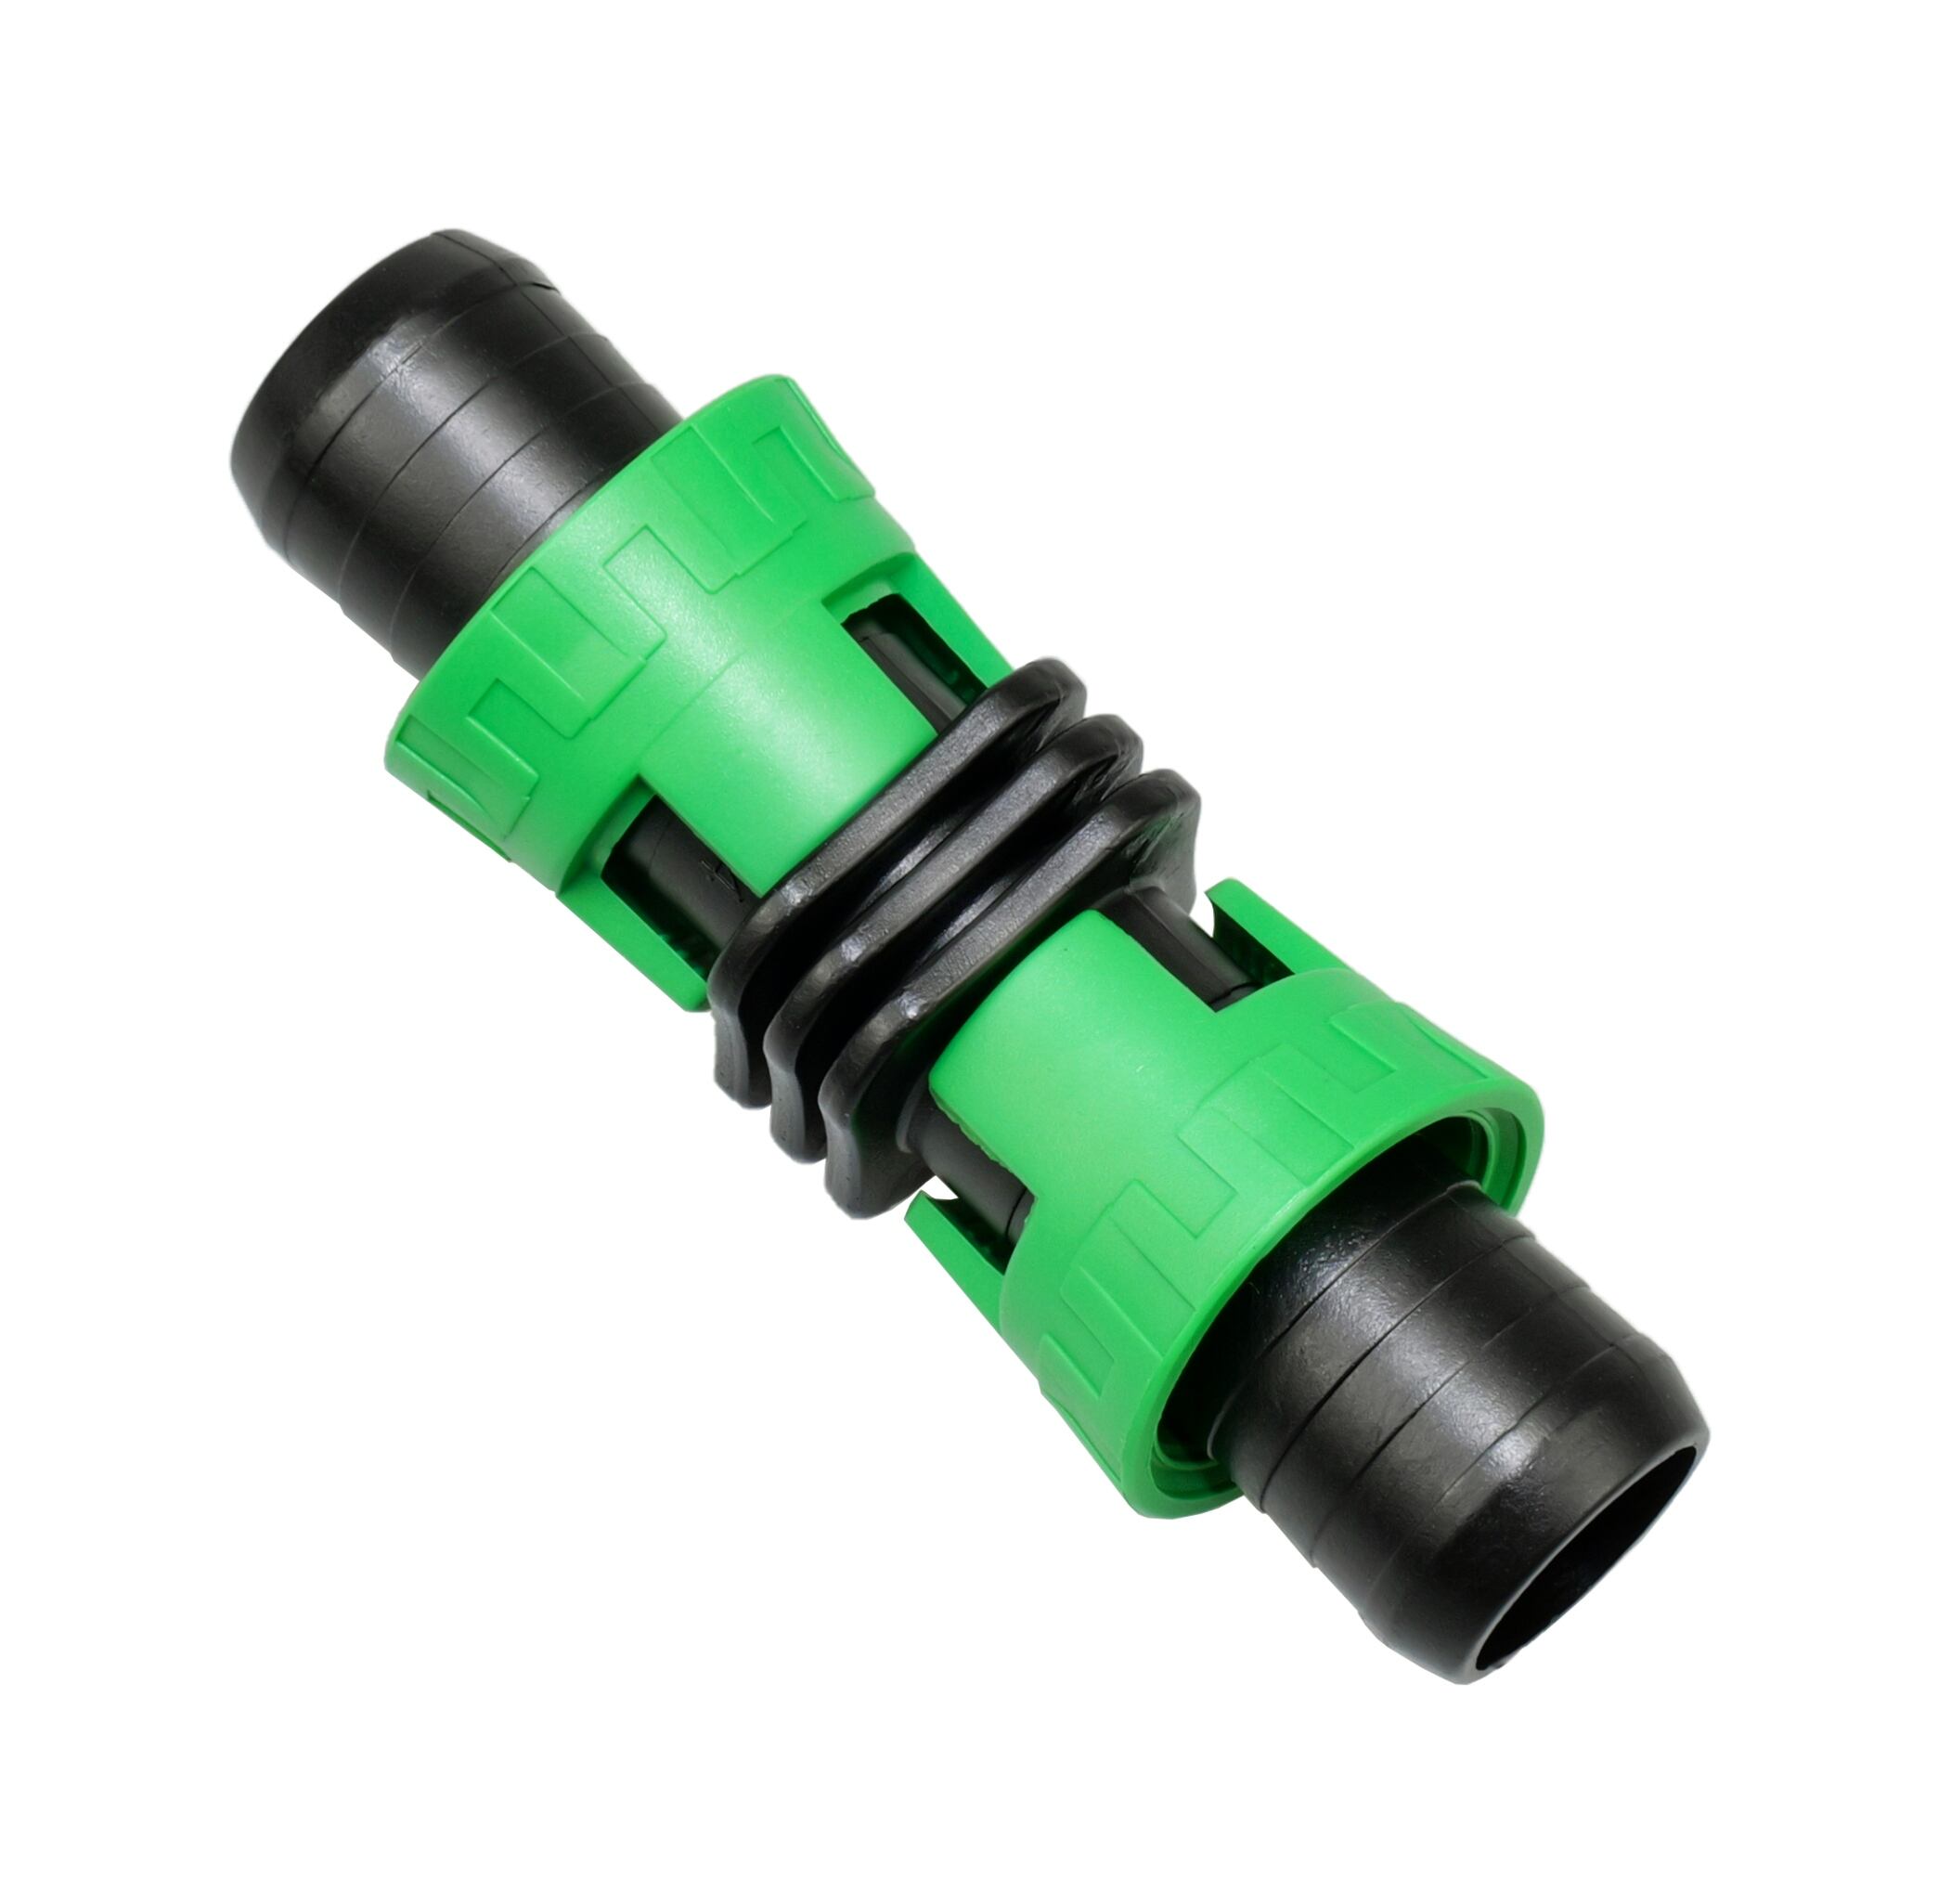
Every drip irrigation line system requires multiple connection points where tape sections join together, branch off to different zones, or connect to main supply lines. These connection points utilize specialized fittings designed to maintain water pressure while preventing leaks and system failures. The most common types include straight connectors for joining tape ends, tee fittings for creating branches, and end caps for terminating lines.
Quality connectors feature internal mechanisms that grip the drip tape securely while maintaining a watertight seal. Understanding how these mechanisms work helps installers recognize when connections are properly seated and when adjustments may be necessary. The materials used in connector construction must withstand exposure to fertilizers, chemicals, and UV radiation without degrading over time.
Material Compatibility Considerations
Different drip irrigation line manufacturers use varying tape wall thicknesses and material compositions, which directly affects connector compatibility. Installing connectors designed for one tape thickness on a different specification can result in loose connections or damage to the tape during insertion. Always verify that connector specifications match the exact tape being used in your system.
Temperature variations throughout the growing season cause expansion and contraction in both tape and connector materials. Premium connectors account for these thermal changes through engineered tolerances that maintain secure connections across a wide temperature range. Selecting appropriate materials for your climate zone prevents seasonal connection failures that could compromise crop irrigation.
Most Common Installation Mistakes
Insufficient Tape Preparation
One of the most frequent errors involves inadequate preparation of the drip tape ends before connector installation. Many installers fail to cut the tape cleanly, leaving ragged edges that prevent proper seating within the connector. Using dull cutting tools or improper cutting techniques creates uneven surfaces that compromise the seal integrity and may cause premature connector failure.
Clean, square cuts ensure that the drip irrigation line inserts fully into the connector and makes contact with all internal sealing surfaces. Sharp, dedicated tape cutting tools produce consistently clean cuts that facilitate proper installation. Taking time to inspect each cut before installation prevents many connection problems that only become apparent after the system is pressurized.
Improper Insertion Depth
Failing to insert the drip tape to the proper depth within connectors represents another common mistake that leads to connection failures. Partial insertion leaves the tape vulnerable to pullout under pressure, while excessive force during insertion can damage internal connector components or the tape itself. Most quality connectors include visual indicators or tactile feedback that signals when proper insertion depth is achieved.
Establishing consistent insertion procedures ensures that every connection receives the same level of attention and achieves the same secure fit. Training all installation personnel on proper insertion techniques reduces variability and improves overall system reliability. Regular inspection of connections during installation helps identify any that may require adjustment before system startup.
Environmental Factors Affecting Installation
Temperature Impact on Connection Quality
Ambient temperature during installation significantly affects both tape flexibility and connector performance. Cold weather makes drip tape material more rigid and difficult to insert into connectors, while excessive heat can make the tape too soft to maintain proper shape during installation. Understanding these temperature effects helps installers adjust their techniques accordingly for optimal results.
Professional installers often schedule connector installation work during moderate temperature periods when both materials perform optimally. When installation must occur during extreme temperatures, allowing components to acclimate to working temperatures before installation improves connection quality and reduces the likelihood of future failures.
Moisture and Contamination Prevention
Moisture, soil, and debris contamination during installation creates long-term problems that may not become apparent until well into the growing season. Even small amounts of soil particles can interfere with connector sealing mechanisms, while moisture trapped during installation promotes corrosion and material degradation over time.
Maintaining clean working conditions and protecting components from contamination during installation requires advance planning and proper storage procedures. Using protective covers or containers to keep connectors clean and dry until needed prevents many contamination-related failures. The investment in proper handling procedures pays dividends through improved system longevity and reduced maintenance requirements.
Proper Installation Techniques
Step-by-Step Connection Process
Successful connector installation begins with careful preparation of both the drip tape and the connector itself. Start by making clean, square cuts on the tape using sharp, appropriate cutting tools. Inspect the cut ends to ensure they are free from burrs, debris, or damage that could interfere with proper seating within the connector.
Insert the prepared tape end into the connector with steady, even pressure until you feel or see the indication that proper depth has been achieved. Avoid twisting or forcing the tape, as this can damage either component and compromise the connection integrity. A properly installed drip irrigation line connection should feel secure and show no gaps between the tape and connector housing.
Quality Control and Testing Procedures
Implementing systematic quality control procedures during installation helps identify potential problems before they affect system operation. Visual inspection of each connection should verify proper insertion depth, secure fitting, and absence of visible gaps or misalignment. Gentle tugging on newly installed connections tests their mechanical integrity without applying excessive force that could cause damage.
Pressure testing represents the final verification step that confirms all connections will perform reliably under operating conditions. Gradually increasing system pressure while monitoring all connections allows early detection of any that may require adjustment or replacement. This proactive approach prevents field failures that could interrupt irrigation schedules during critical growing periods.
Troubleshooting Connection Problems
Identifying Leak Sources
When leaks develop at connector locations, systematic troubleshooting helps identify the root cause and appropriate corrective action. Visual inspection often reveals obvious problems such as incomplete insertion, damaged tape ends, or contamination within the connector. More subtle issues may require closer examination of the connection interface and surrounding components.
Common leak sources include degraded sealing surfaces, thermal expansion effects, or mechanical stress from system movement. Understanding these potential causes helps guide the troubleshooting process and ensures that corrective actions address the underlying problem rather than just treating symptoms. Proper documentation of recurring problems helps identify patterns that may indicate systemic issues requiring broader attention.
Preventive Maintenance Strategies
Regular inspection and maintenance of drip irrigation line connections extends system life and prevents unexpected failures during critical periods. Seasonal maintenance schedules should include visual inspection of all connections, testing of system pressure integrity, and replacement of any components showing signs of wear or damage.
Proactive replacement of connectors at regular intervals, based on manufacturer recommendations and field experience, prevents failures that could damage crops or waste water resources. Maintaining adequate spare parts inventory ensures that maintenance activities can be completed without delays that might affect irrigation schedules. Well-planned maintenance programs typically reduce total system operating costs while improving reliability and performance.
Advanced Installation Considerations
System Design Integration
Proper connector installation must consider the broader system design and operational requirements. Connection locations should account for system expansion and contraction, access requirements for maintenance, and protection from mechanical damage during field operations. Strategic placement of connections can significantly impact long-term system reliability and maintenance efficiency.
Integration with automated control systems may require special attention to connector locations and orientations to ensure proper sensor function and system monitoring capabilities. Understanding these broader system requirements helps installers make decisions that optimize both immediate installation success and long-term operational performance.
Future Expansion Planning
Many drip irrigation line systems require modifications or expansions over time to accommodate changing crop patterns or field configurations. Installing connectors with future expansion in mind can simplify these modifications and reduce long-term costs. Consider accessibility, standardization, and compatibility factors when making initial installation decisions.
Documentation of connector locations, specifications, and installation dates provides valuable information for future maintenance and expansion activities. Maintaining accurate records helps ensure that replacement components match existing specifications and that system modifications maintain design integrity. This forward-thinking approach supports efficient system evolution as needs change over time.
FAQ
What tools are essential for proper drip tape connector installation?
Essential tools include sharp tape cutting implements specifically designed for drip tape, clean cloth for wiping components, and appropriate measuring devices to ensure proper insertion depth. Quality cutting tools produce clean, square cuts that facilitate proper connector seating, while contamination prevention materials help maintain connection integrity during installation.
How can I determine if a drip irrigation line connection is properly installed?
Properly installed connections show complete tape insertion to the designated depth marker, secure fitting without gaps or misalignment, and resistance to gentle pulling forces. Visual inspection should confirm that the tape is fully seated within the connector housing, and pressure testing should reveal no leakage at operating pressures.
What environmental conditions should I avoid during connector installation?
Avoid installation during extreme temperatures that make tape material too rigid or too soft for proper handling. Windy or dusty conditions increase contamination risk, while wet conditions can trap moisture within connections. Plan installation activities for moderate weather conditions when both materials and working conditions are optimal.
How often should drip tape connectors be inspected or replaced?
Inspect connections at the beginning of each growing season and periodically throughout the irrigation period, particularly after extreme weather events or mechanical field operations. Replace connectors showing signs of wear, damage, or degradation according to manufacturer recommendations or when performance testing indicates reduced reliability. Proactive replacement typically costs less than emergency repairs during critical growing periods.